
We can create a grid system in React Native in a lot of ways. One of the best ways to do it is using FlatList, which is provided by React Native.
This post is about creating a responsive grid system using FlatList. To implement this, readers should have basic knowledge of JavaScript, React, and React Native. We’ll also be using the awesome script-less testing tool from Waldo to test our application.
The Setup
In this project, we will use Expo CLI. It is much easier to use than the React Native CLI. The Expo CLI is also recommended in the official document for beginners. We will install the Expo CLI globally using the below command:
To create a new React Native project, we use the expo init command followed by the project name. I am calling the project “grid-flatlist.”
Next, we will be asked to choose a template. Here, we are choosing “blank” because we want a totally empty app. Press Enter to proceed here.

If we don’t get any errors, we will get the below screen. Here, we will also get the instructions to run our project.
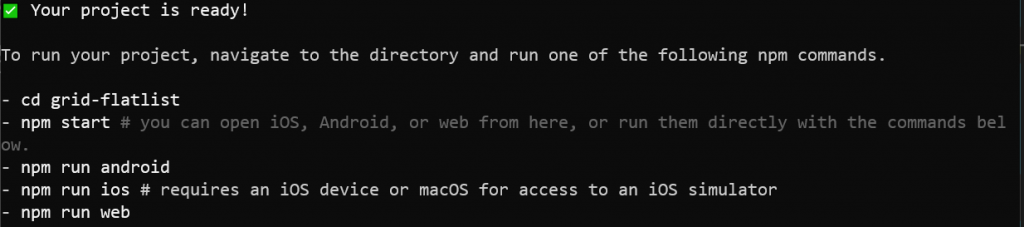
Starting Grid Project
As per the instructions on the previous screen, we are first navigating to the grid-flatlist directory. After that we have to start the project with npm start.

If we don’t have any errors, then the Metro Bundler will be launched on http://localhost:19002/. We get mainly four options to run our app in Metro Bundler. The first option is to run in an Android Emulator. The second one is to run in an iOS simulator. The third is to run the web version, which is actually a web app, and it can also be deployed like a web app.
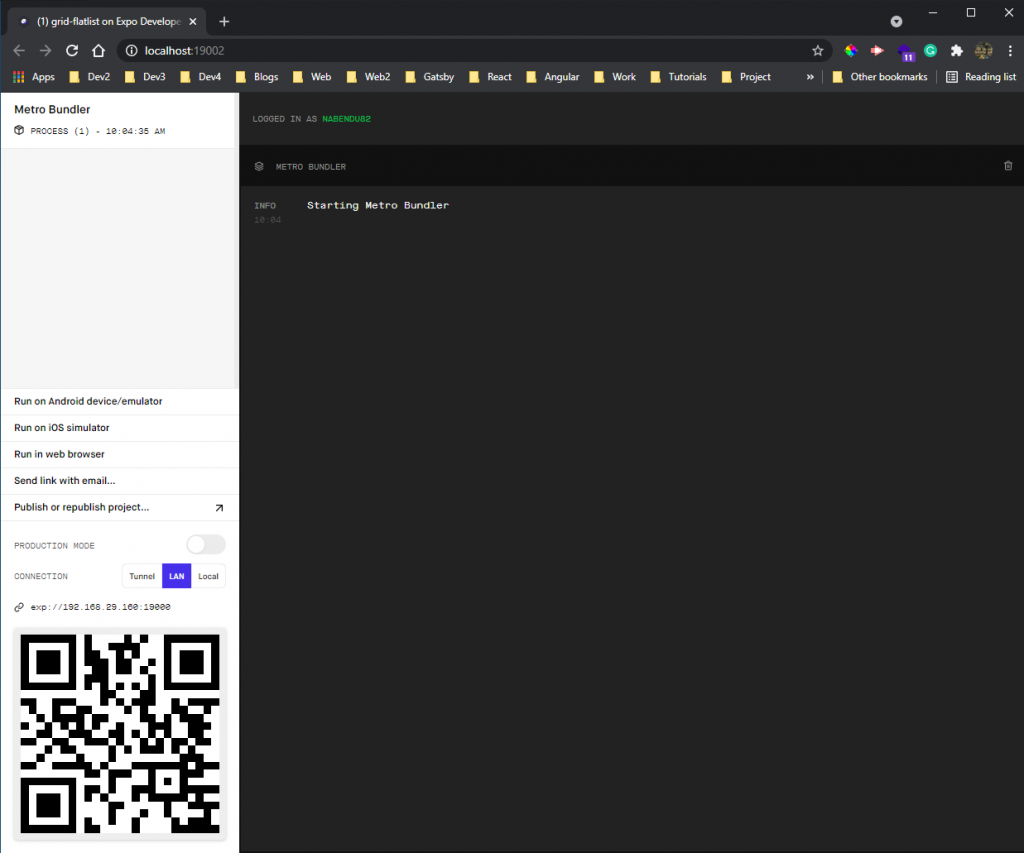
I use the fourth way to run the app, which is to run it on a physical device. It is faster and gives the exact look of the app on a real device.
For that we need to scan the QR code, given by Expo (as seen in the above screenshot) through the Expo Go mobile app. The app is available in both the App Store and the Google Play store.
Once the app is installed, click on the Scan QR Code text. It will open the camera to scan the QR Code.
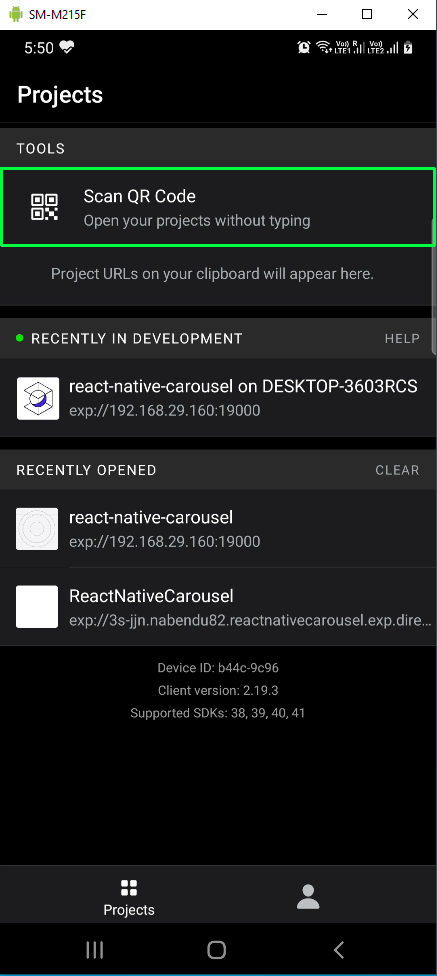
After we scan the QR Code, the application will open on our mobile device. It will show the default text of a React Native Expo app.
Starting FlatList
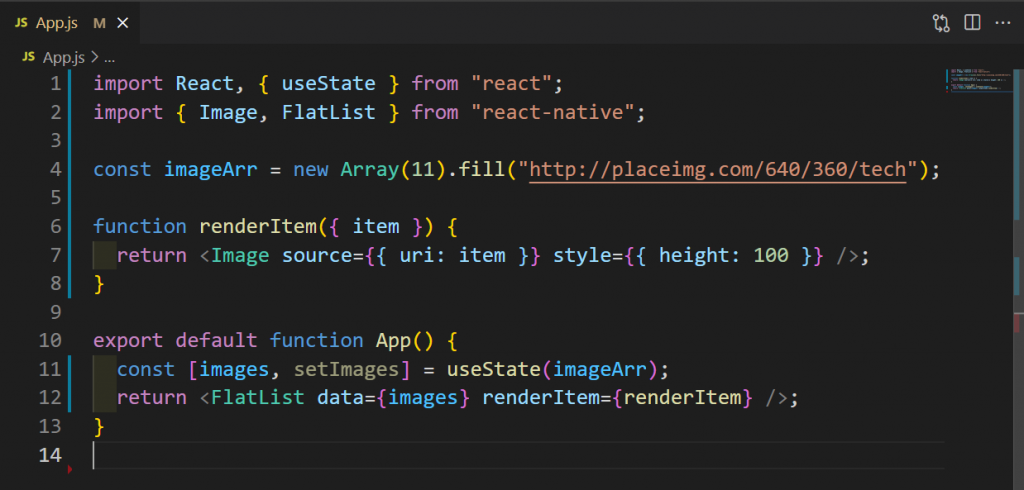
We will first start with adding a simple FlatList in our App.js file. Remove all the code that comes in this file and add the below code.
Here, we are first importing Image and FlatList from React Native. After that we are getting eleven images from http://placeimg.com and storing them in an array called imageArr. Then, inside the return statement, we are showing the FlatList. We need to provide two required attributes in a FlatList:
- data: the array of items we iterate over
- renderItem: the component we render for each item
In our app, we are using React useState to store the array imageArr. Inside the renderItem function, we are showing the item through the Image from React Native.
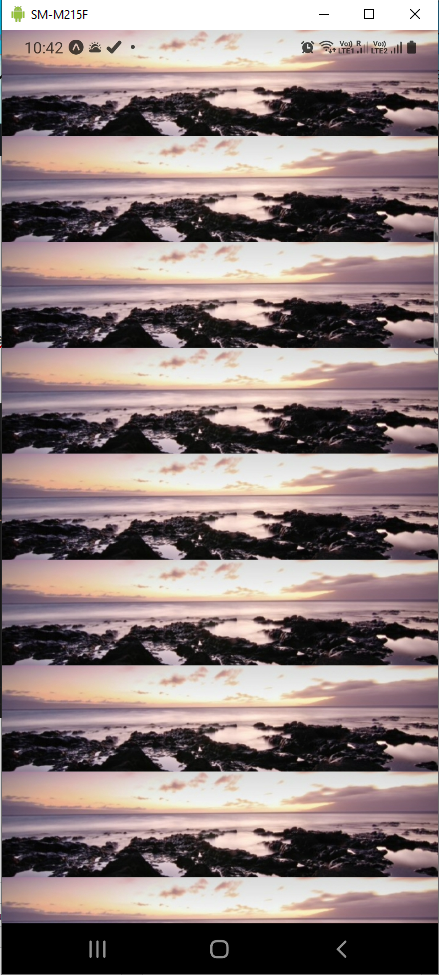
The result will be a list of stretched images with a height of 100.
Introducing Columns
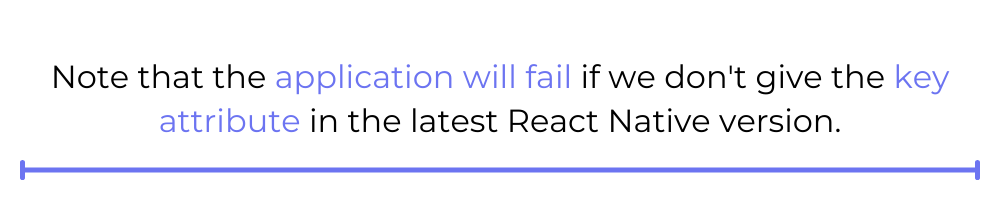
Now, we will introduce columns in our project to create a grid layout. Here, we add the numColumns attribute to FlatList and also a required key attribute. Note that the application will fail if we don’t give the key attribute in the latest React Native version. We have given both of them as 4 in our app.
We also have to give a width to each image, or else we will get a white screen. So, in the Image tag, we are giving width in the style attribute. The updated code is shown in green in the below code screenshot.
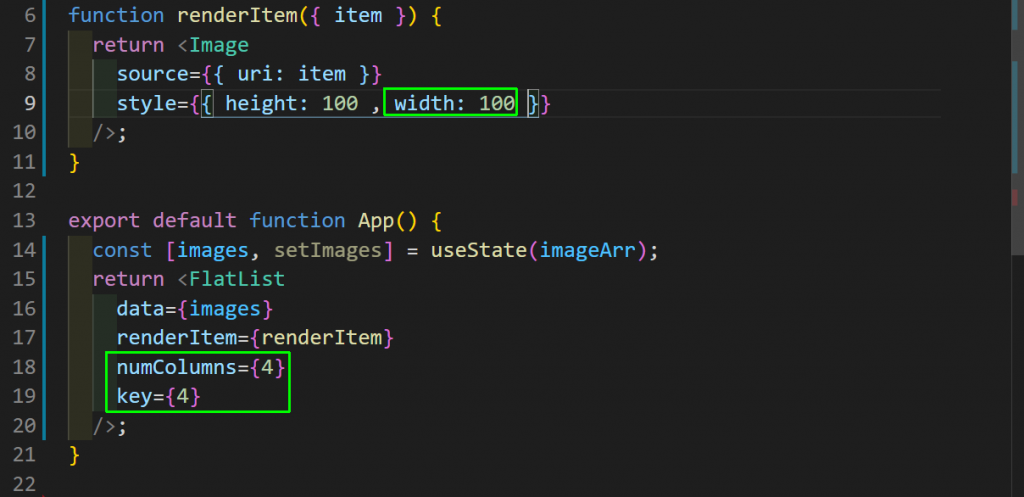
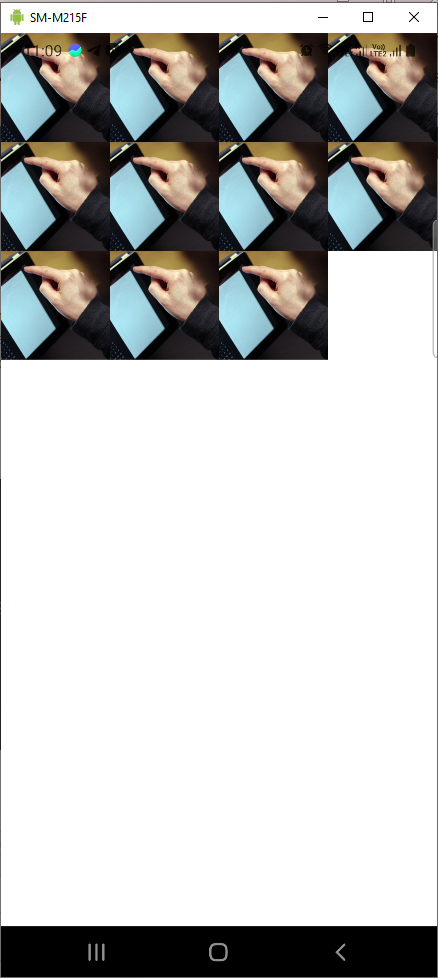
Now, the images are shown in a grid, but since the width is fixed at 100, the last column images are not fitting correctly.

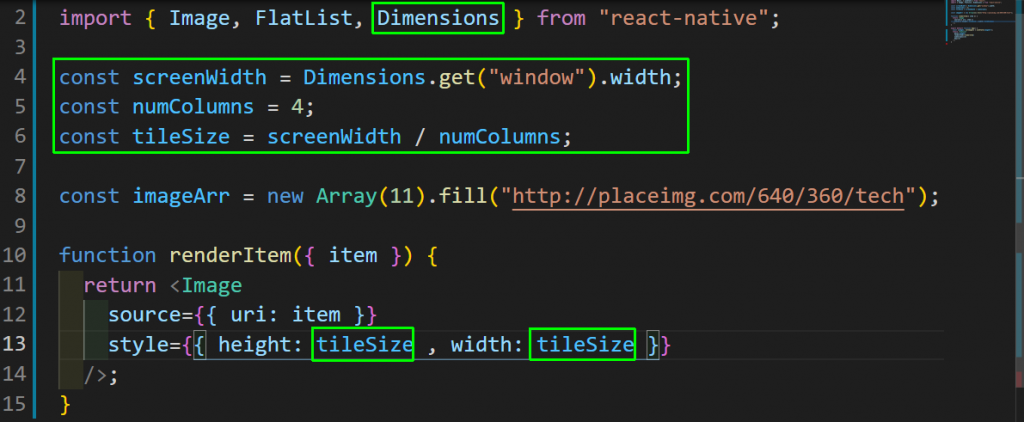
Fixing Size With Dimension API
We can fix the last column problem using the dimension API, provided by React Native. With the dimension API, we can get width and height depending on the device. In our application, we are getting the width of the screen. After that, we can get the size of each image tile by dividing it by the number of columns.
We are now using the tileSize variable inside our Image tag for height and width.
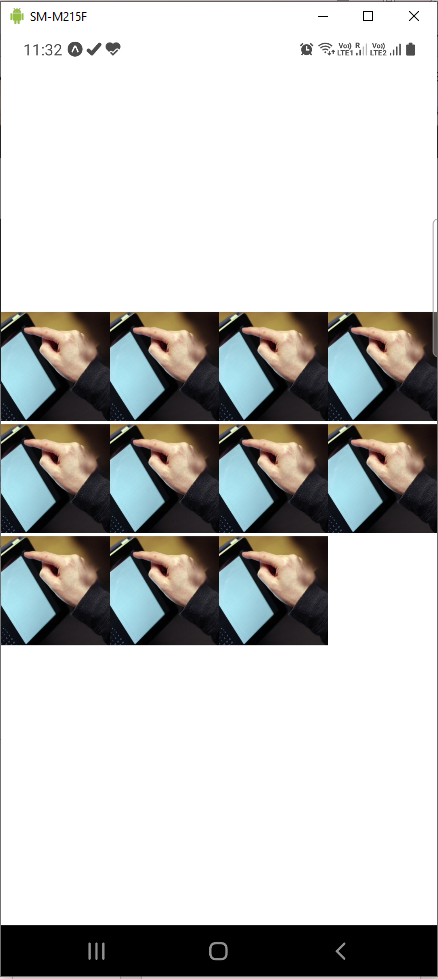
Now, our images will be shown properly and the last column issue is resolved.
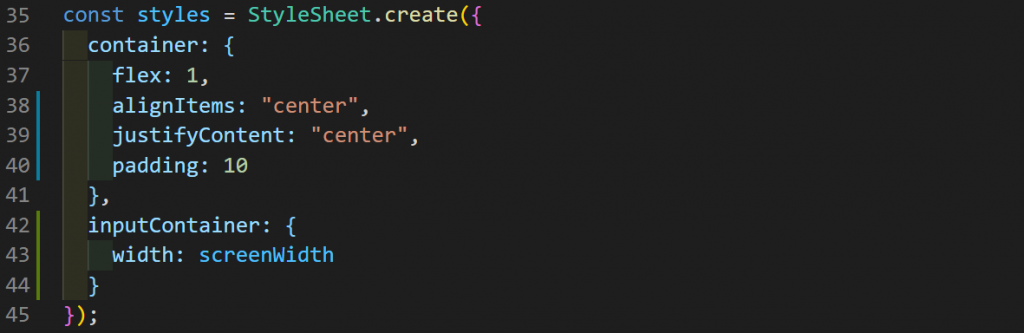
Styling the App
Our app is not looking good, and the grid-based photo gallery is showing at the top, so it is overlapping with the navigation bar and notches in most devices. First, we need some additional elements from React Native. So, we will update our import statement to include those.
Next, we will wrap our FlatList with a SafeAreaView and View. We will write the styles for them next. Inside the FlatList, we have also added the attribute ItemSeparatorComponent. This is calling an inline function, which adds a height of 3 after each row.
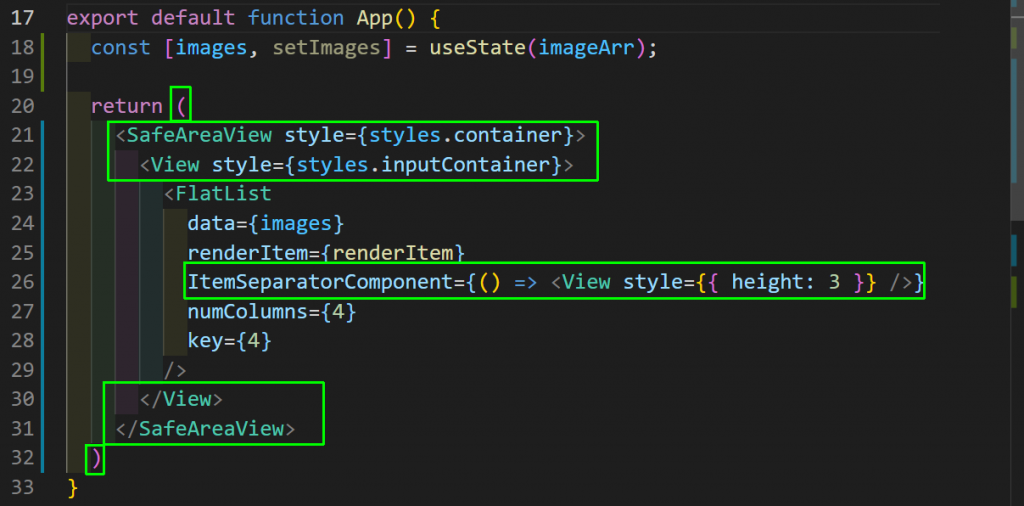
Lastly, we will add the styles in the app. Here, the container class is a flex, with everything centered. Also, notice that the inputContainer class has a width set to the screen width, which we have calculated earlier with the dimension API.
Now, our app is complete and showing perfectly.
Creating the APK
The APK file is required for us to upload our app to iOS or Android app stores. It will be also used for the no-code testing in the next part. We’ll create an APK file for the Google Play store using Expo. The official docs are the best place for reference.
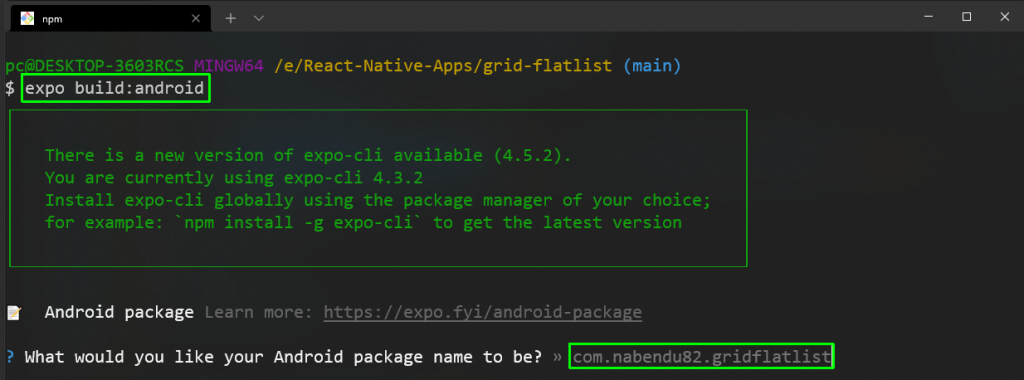
First, open your terminal and run the below command:
On running the command, we will be asked to give the Android package a name. The default name is a combination of your user name followed by the project name. It is advisable to keep it as default and press Enter.
Next, leave the build type as the default option of APK and press Enter.

In the next screen also, keep the default option as “Generate new keystore.” Press Enter.

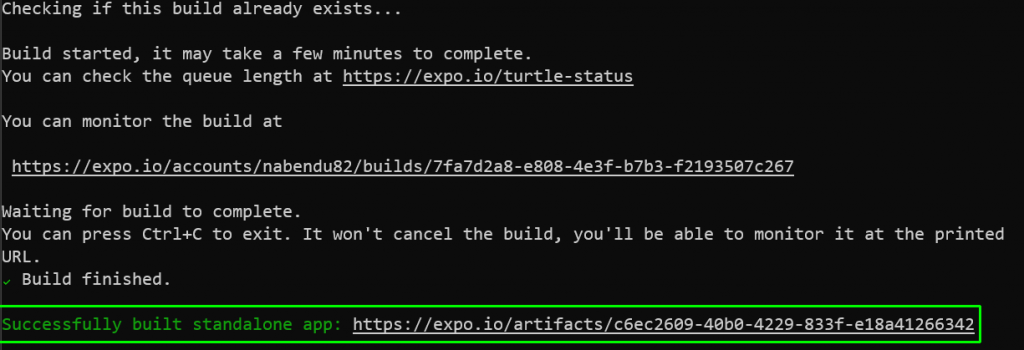
The APK building process will start, and it generally takes 10 to 15 minutes. When it is done successfully, it will give us a link. Open the link in a browser, and download the APK file.
Waldo No-Code Testing
For testing, we’ll be using the awesome Waldo no-code testing tool. We will require the APK file created in the previous step for this.
We need to first create a free Waldo account. This must be done using a business email address, as personal mail cannot be used.
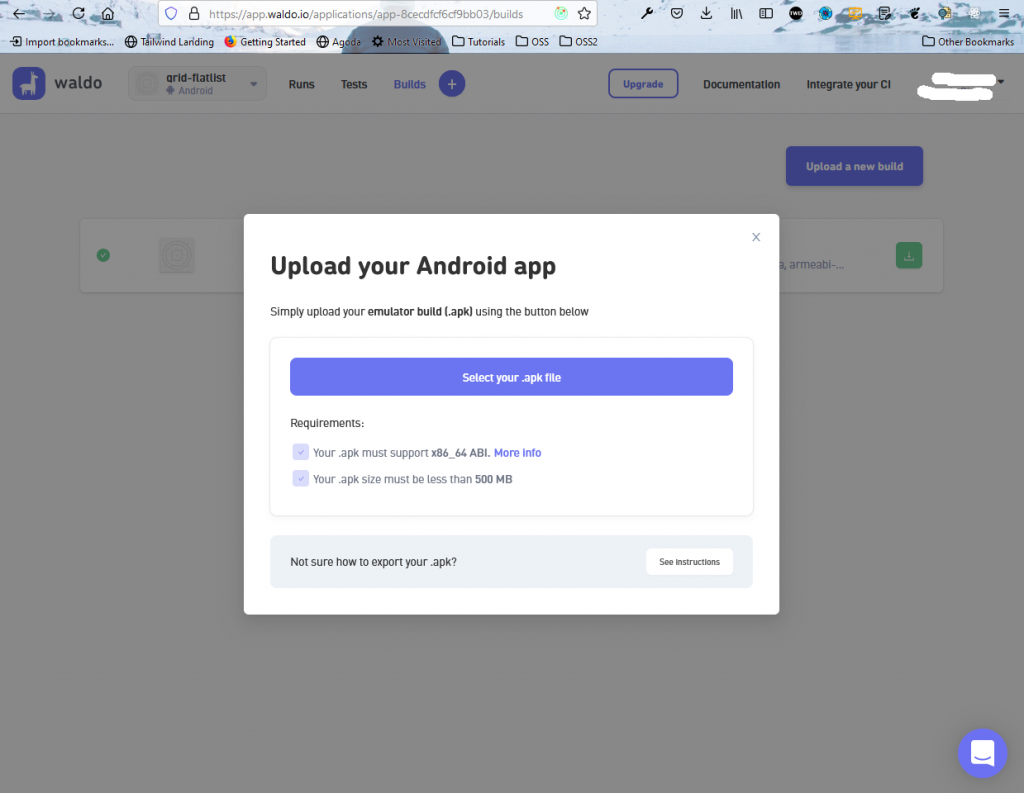
Next, we need to upload the APK file. Returning users who have already tested an app will get a different dashboard. They need to click the + icon, which will open a drop-down menu. Then click on Upload a new build.

A pop-up will be shown, and we need to select the APK file in it.
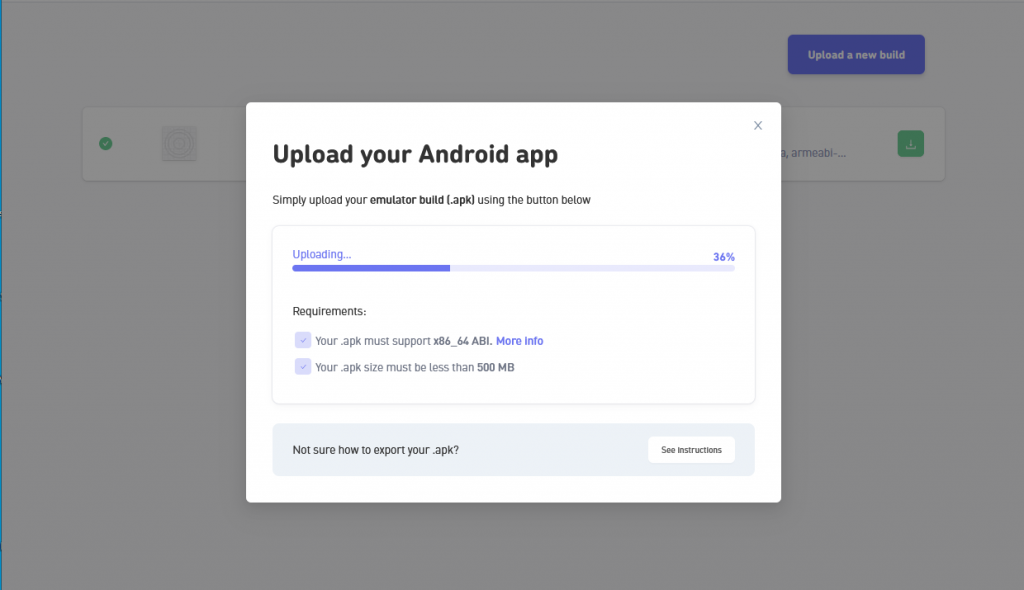
After that, the upload will be done, as well as the verification of the app.
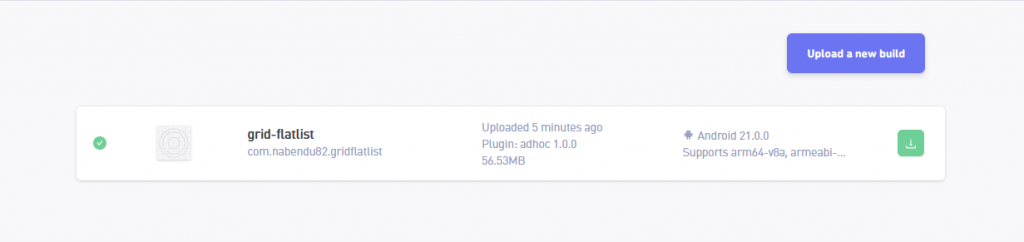
We will see all of our builds on the next screen. Click on the latest build here.
We need to perform various interactions on the next screen. Perform all the interactions, which you will do on a real device for better testing results.
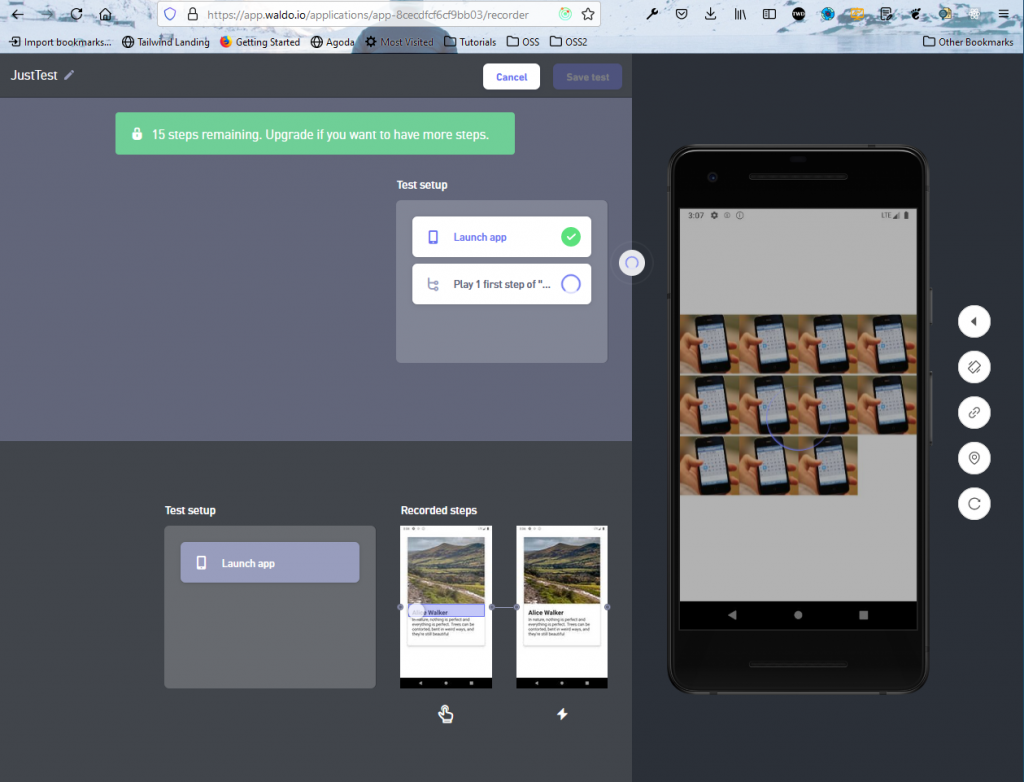
After that, click on the Save test button on the above screen, and our test will be run.

Wrapping Up
In this post, we’ve learned to implement a grid in a React Native application. We implemented the grid quickly using the inbuilt FlatList component in React Native. We have also learned to create an APK easily using Expo, and we have also tested our app using the no-code Waldo tool.

By using an easy-to-use FlatList component, we were able to effortlessly implement a modern responsive grid in our project. Our app was also tested without writing any complicated unit tests or integration tests, which we achieved using Waldo. See how you can do the same by giving Waldo a try today.
Automated E2E tests for your mobile app
Get true E2E testing in minutes, not months.