
Maps are an integral part of a lot of mobile apps nowadays. They are used for everything from finding directions somewhere to tracking one’s location when out for a jog. It’s a good thing, then, that maps are very easy to integrate in a React Native app.
In this post, we will learn how to integrate Google Maps into a React Native app. We are going to use the react-native-maps library developed by Airbnb in this post. There are some other libraries also, but most of them are not well maintained and have bugs.
The prerequisite to develop this app is knowledge of JavaScript, React, and React Native. We are also going to use the awesome no-coding testing tool Waldo to test our app.
Basic Setup
In this project, we will be using Expo CLI to create a React Native app. It is much easier to use than React Native CLI and is very efficient for a small map demonstration like this post. If we want finer control in our production project, we need to go with React Native CLI. As per expo documentation, we need to install Expo CLI globally using the command below.
Now, we will create a new project for our app using the command below.
expo init react-native-gmapsExpo will ask us to choose a template, and we will choose the option to create a minimal app.

It will take about two to three minutes to create a React Native app, but it depends on the system configurations. If everything is successful, we will see the screen below.

Getting Started
We will now start with our project and follow the instructions above. We need to change to the directory first with the cd command and then start the project with the npm start command.

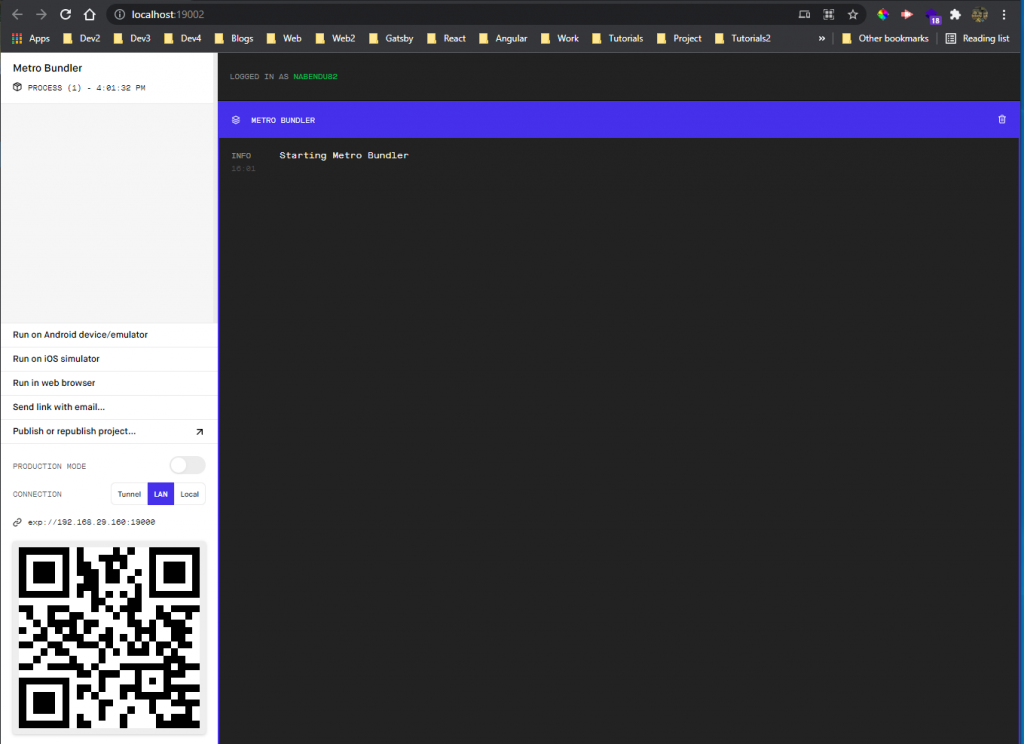
It will open the Metro Bundler in http://localhost:19002/, which will show a QR code at the bottom left. You can run this app on an Android emulator or an iOS simulator, but I personally don’t run on any of them.
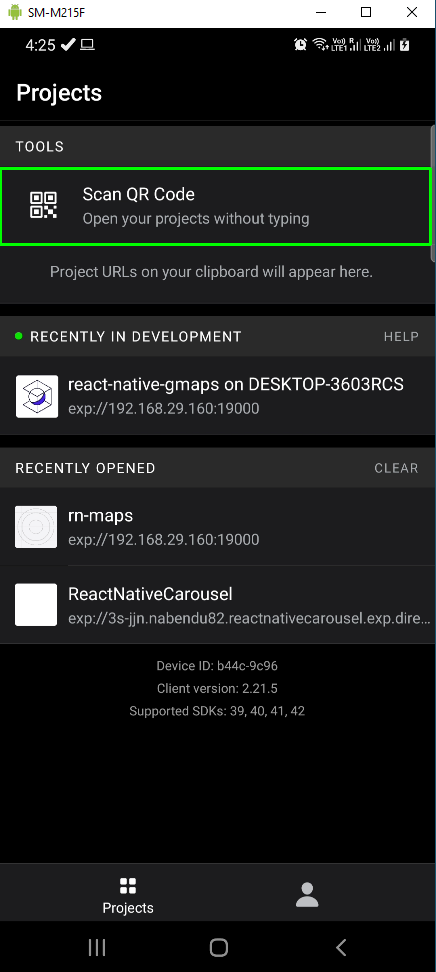
Running an app on emulators requires a top specification system, and they are slow. Instead, you can open the app in your phone by downloading an Expo Go app from the Play Store or the App Store.
After that, open the Expo Go app and click on Scan QR Code.
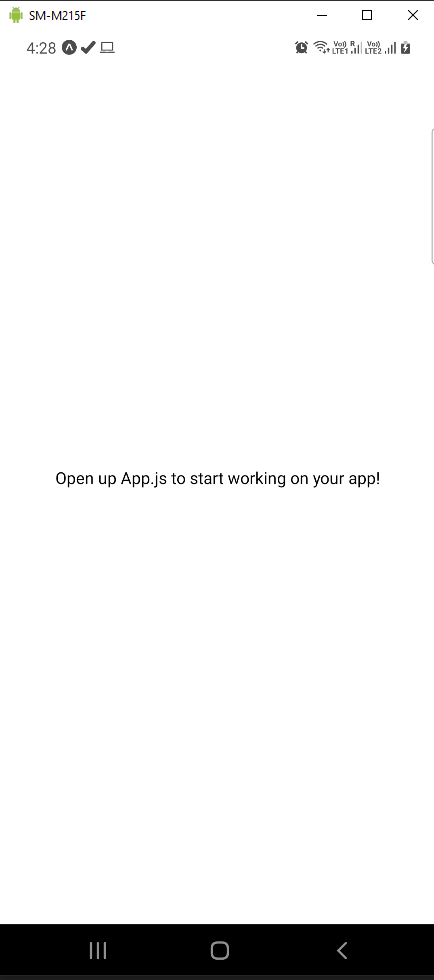
It will open the app on your mobile phone and show the start-up text of a React Native Expo app.
Installation
One thing to notice is that API Keys are only required if we are uploading our app to Google Play Store or App Store. We will not be doing that now, so API Keys won’t be required. We will be installing react-native-maps by running the command below from our project folder.

Basic Usage
The starting point of a React Native app is App.js, and for our simple app, we will update it only. Open the App.js file and remove the lines below in it.

Now we will import MapView, which is used to display the map, in our project. We are using it inside the return statement and giving four props to it. The four props descriptions are described below.
- style: To give any specific style to the map. Here, we are using StyleSheet.absoluteFillObject, which will make our app launch in full screen mode.
- provider: We are giving the provider as Google. If we don’t specify it, it will be given the native map framework (i.e., Apple Maps for iOS and Google Maps for Android).
- mapType: We are taking it as hybrid, which is the default standard. The other options are satellite and terrain.
- region: We have to give an object containing latitude, longitude, latitudeDelta, and longitudeDelta. Latitude and longitude are the coordinates in which the map will start. The latitudeDelta and longitudeDelta are used for calculating the size of the map.
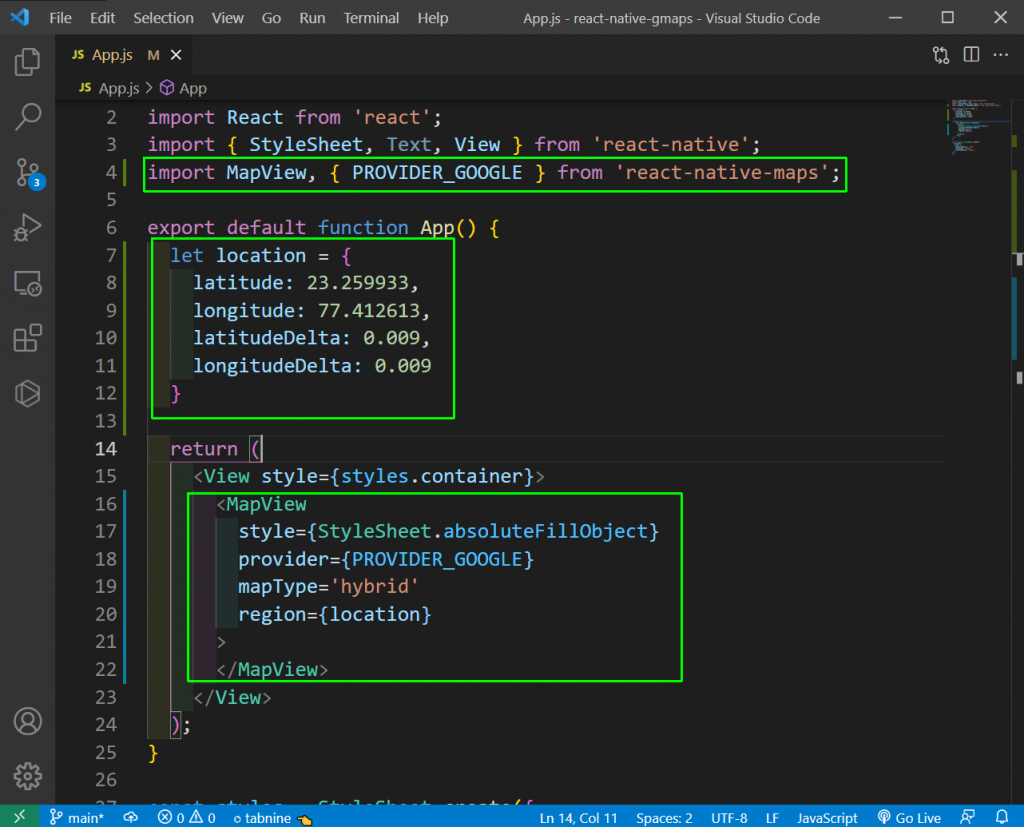
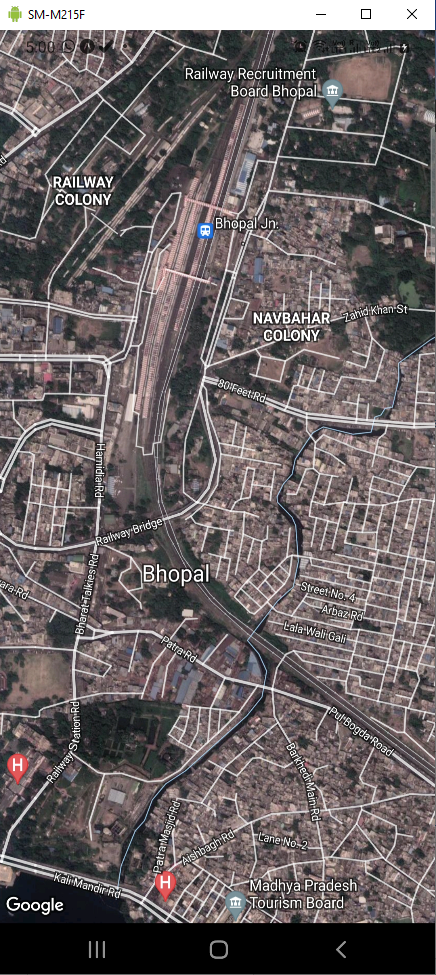
Now, a beautiful, full-sized Google Map will be shown in our app.
Marker for Current Location
We can also display a marker for any location in our application. To display a marker, we need to include Marker component as a child of MapView component. We are using the same coordinates here.

Now, a nice marker will be shown in our app.

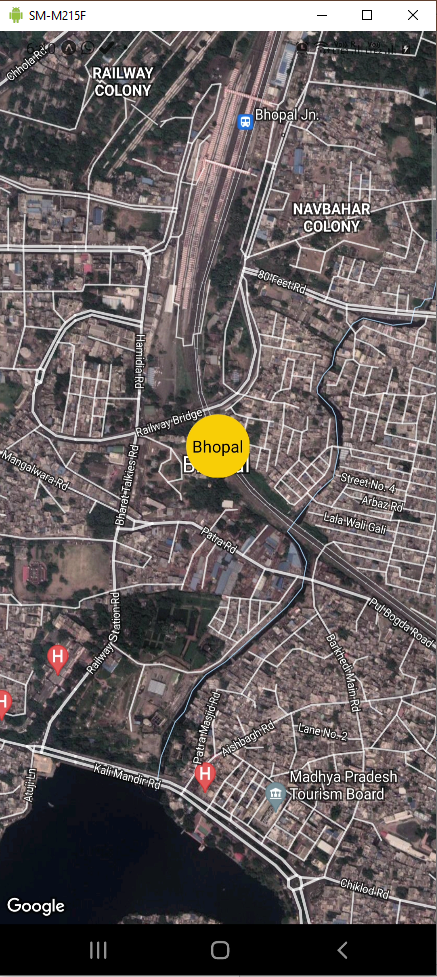
Customizing the Marker
We can also customize the marker to show anything instead of the current drop pin. First pass any component as a child of Marker component. We are passing a StyledMarker component as a child, which creates a beautiful yellow circle with centered text.

Now, a yellow marker will be shown instead of the default marker.
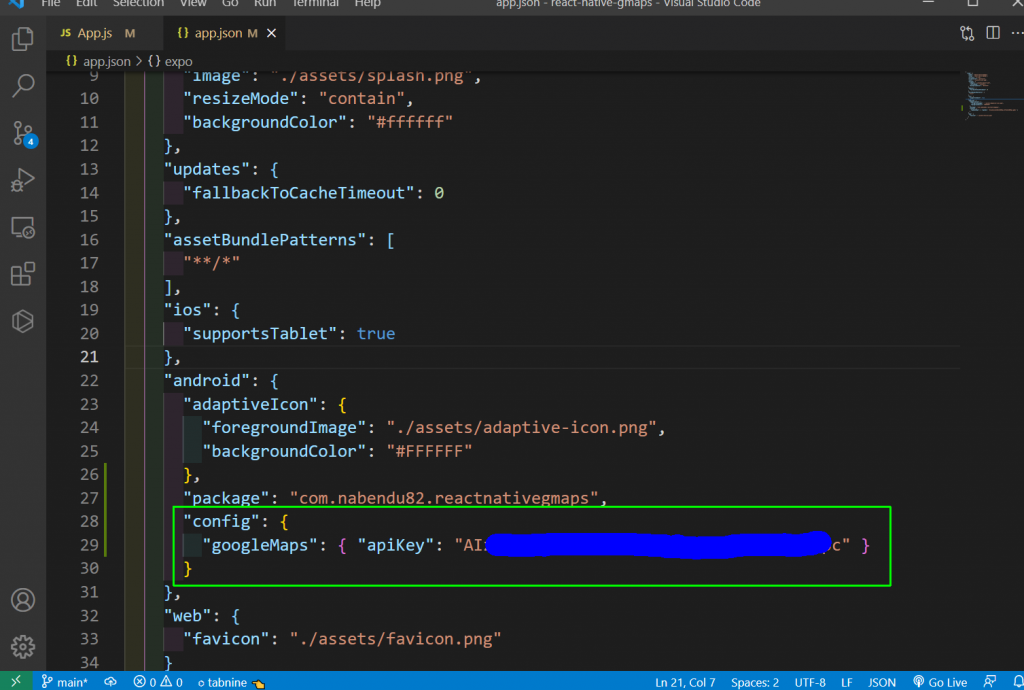
Adding Google API Keys
We want to build an APK file, and for that we need to add Google API keys for Maps SDK. I have followed the process in the official expo documents and created the API keys for Maps SDK for Android. The instructions for that can be found here.
As per the documentation, we have to add the API keys in app.json file.
Building the APK File
We need the APK file to deploy the app in the Google Play store and also for testing in the next part. Creating an APK file with Expo is very easy. We just have to give the command below from inside the app.
Next, it will ask us to give a package name. Just press Enter to move ahead.
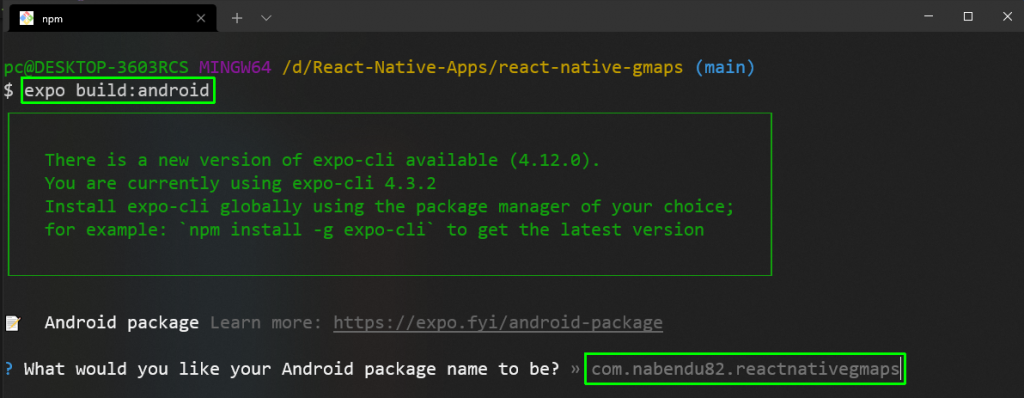
Now, it will ask for the build type. Just press Enter, as we need APK only.

Next, it will ask to upload a keystore or generate a new one. Leave the default option of Generate new keystore and press Enter.

Now, the APK build process will start. It takes a good 10 to 15 minutes and generates a file of around 60 MB. If the process is successful, we will get a link to download the APK file. Copy the link in a browser and it will start the download.

Waldo No-Code Testing
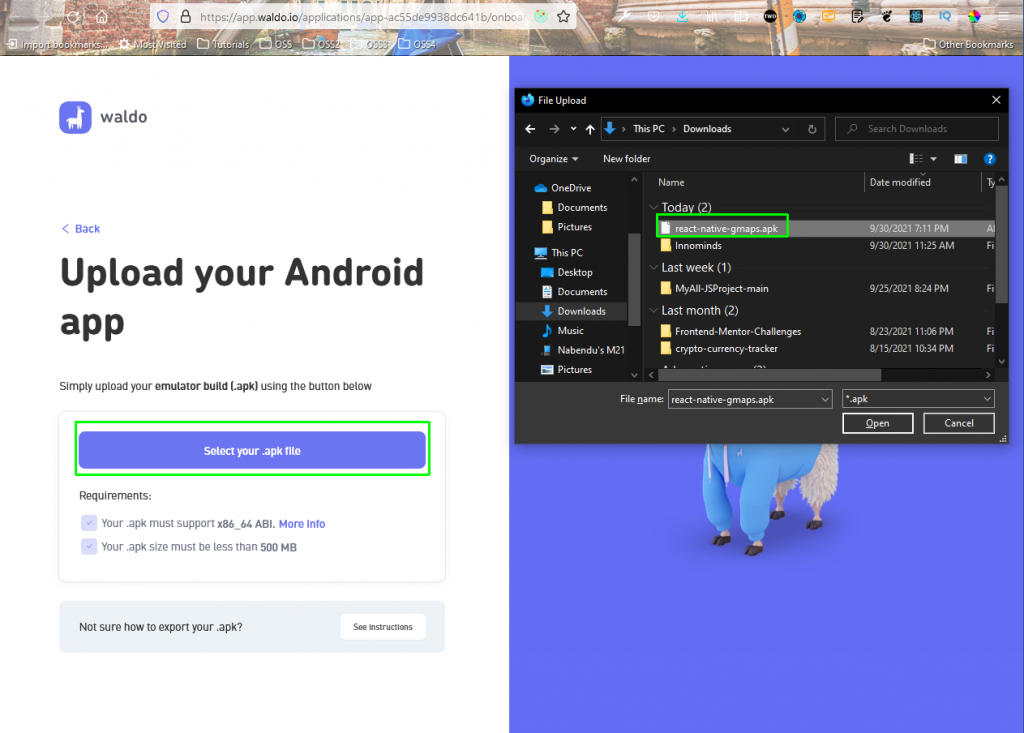
We will test our application with the awesome no-code testing platform called Waldo. To test our app, we require the APK file from the previous step.
First create a free Waldo account from this link. Now, we need to upload the APK file. Click on Select your .apk file and select the file from your local system.
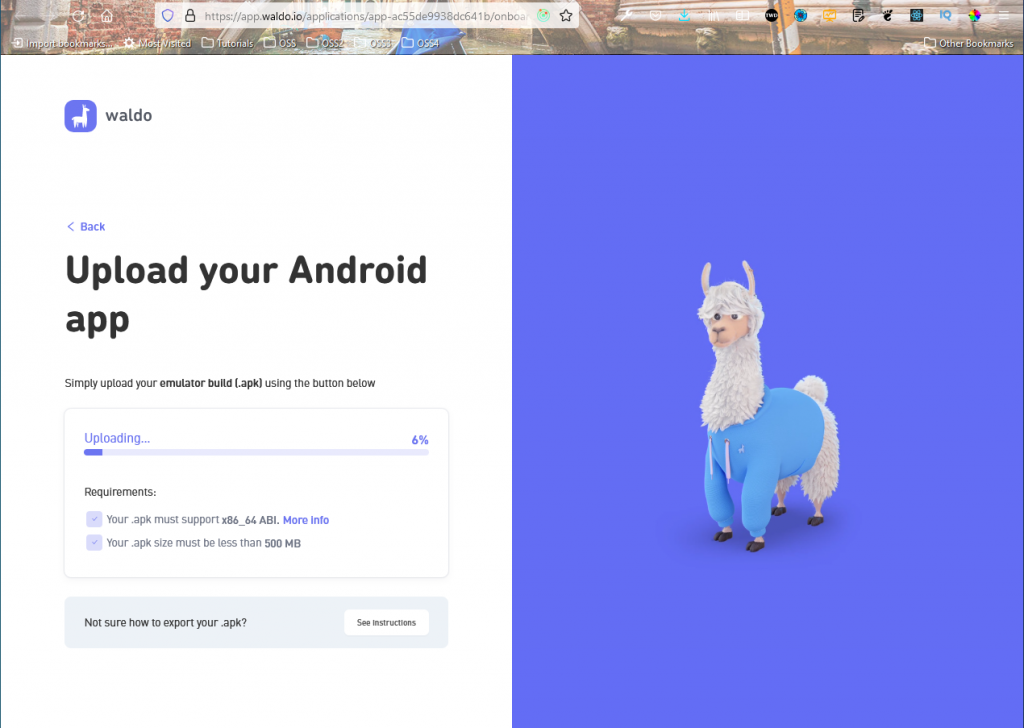
It will take about two to three minutes to upload the file.
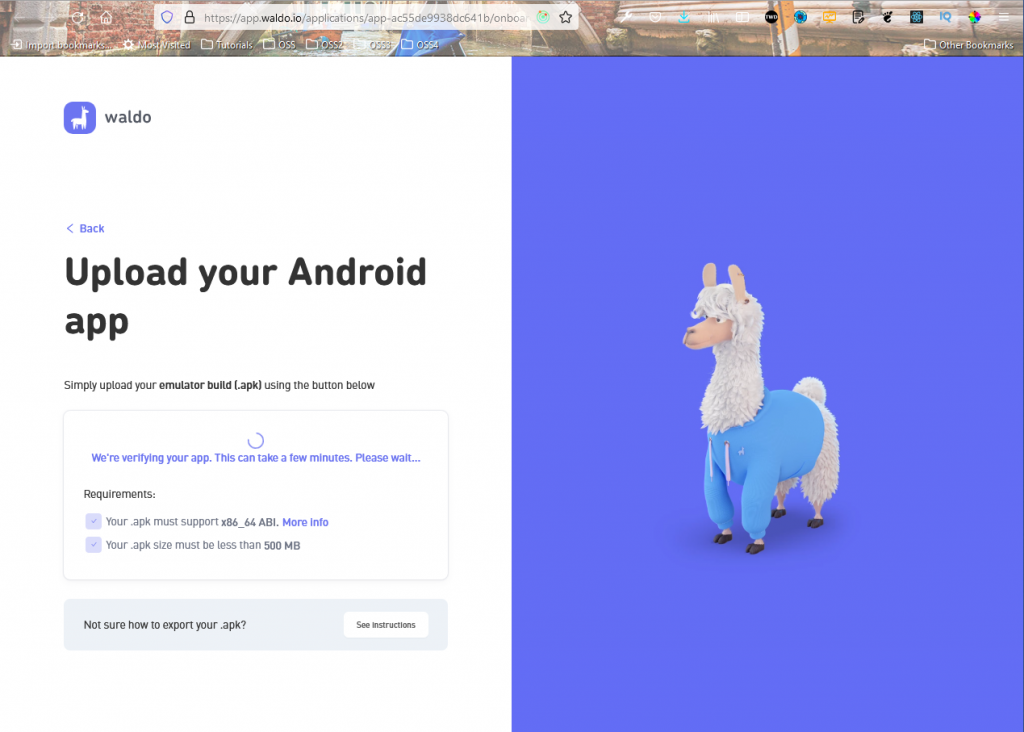
After that, Waldo will verify our app, which will take another minute or two.
After that, it will prepare our app for testing and show us a nice animation.

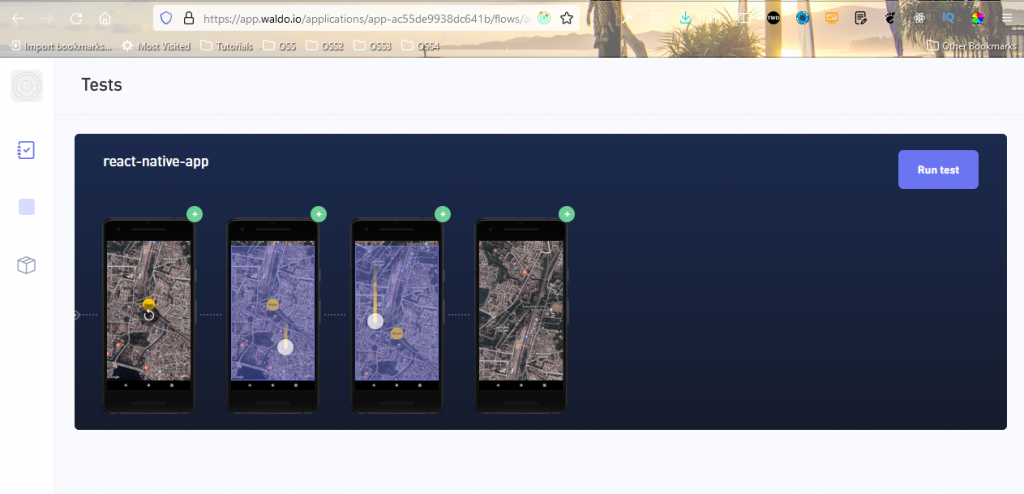
In the next screen, we will be able to perform up to 15 interactions with the app. (This limitation exists in the free version.) After completing the interactions, click the Save test button.

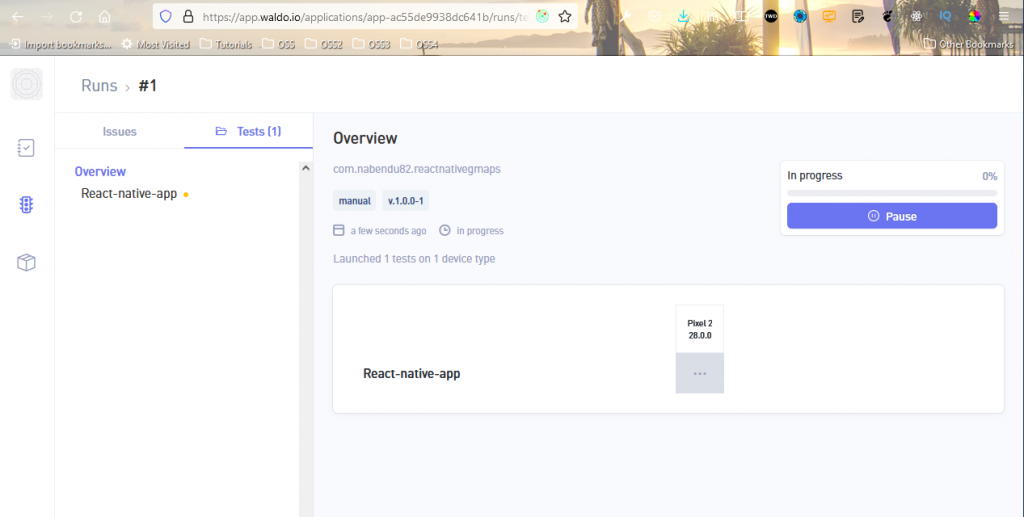
In the next screen, click the Run Test button.
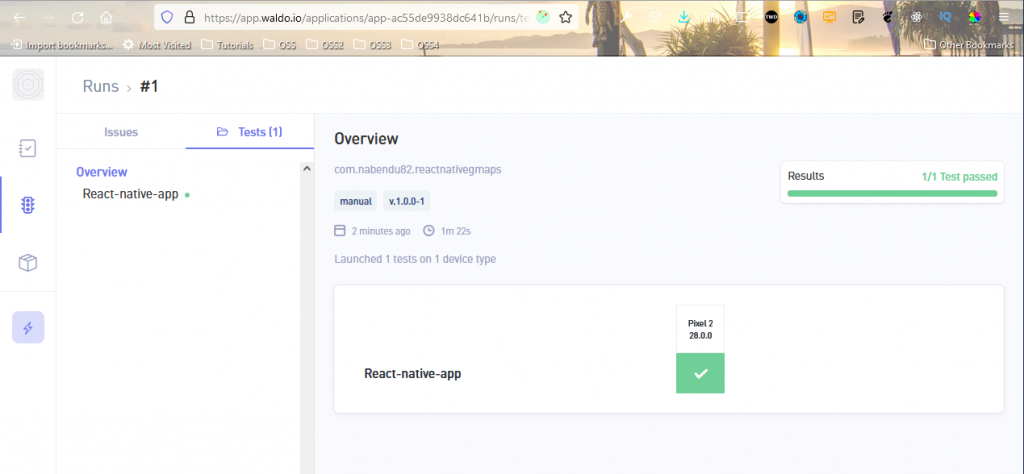
It will take one to two minutes to run the tests.
We’ll also receive an email containing our test results at the registered email address.
Conclusion
In this post we have learned to add maps in our React Native app. We have implemented a map in our app through the easy-to-use react-native-maps package from Airbnb. We have also learned how to add a marker in the map and how to customize it.
After that we learned to create an APK file easily with Expo. We also did a quick and successful test with the Waldo no-code testing platform.
With Waldo we were able to test our app without writing those complicated unit tests. So, give it a try.
Automated E2E tests for your mobile app
Get true E2E testing in minutes, not months.